
PM2 自动化部署
什么是 PM2
PM2 是一个 node 后台进程管理工具,你可以对进程进行 start、stop、restart 或者 delete 等操作,还可以支持性能监控、负载均衡等功能,同类型的还有 forever 等:
npm install pm2 -g
| Feature | Forever | PM2 |
|---|---|---|
| Keep Alive | ✔ | ✔ |
| Coffeescript | ✔ | |
| Log aggregation | ✔ | |
| API | ✔ | |
| Terminal monitoring | ✔ | |
| Clustering | ✔ | |
| JSON configuration | ✔ |
PM2 is daemon process manager that will help you manage and keep your application online ✅
常用命令
# 启动一个 node 程序
pm2 start index.js
# 启动并取别名
pm2 start app_h5/bin/www --name application1
# 在文件改变的时候会重新启动程序
pm2 start index.js --watch
# 中止进程,指定进程 id 或名称,
pm2 stop 0
# 删除进程,all 则删除所有
pm2 delete 0
# 查看详情
pm2 describe 0
# 查看进程的资源消耗情况
pm2 monit
# 重启进程,也可用 restart
# Use reload instead of restart for 0-seconds downtime reloads
# restart 是先 kill 然后重启,而 reload 反之,故不会停机
pm2 reload 0
# 查看日志
pm2 logs 0
# 集群 cluster 启动 - 负载均衡
# -i 表示 number-instances 实例数量
# max 表示 PM2 将自动检测可用 CPU 的数量 可以自己指定数量
pm2 start start.js -i max
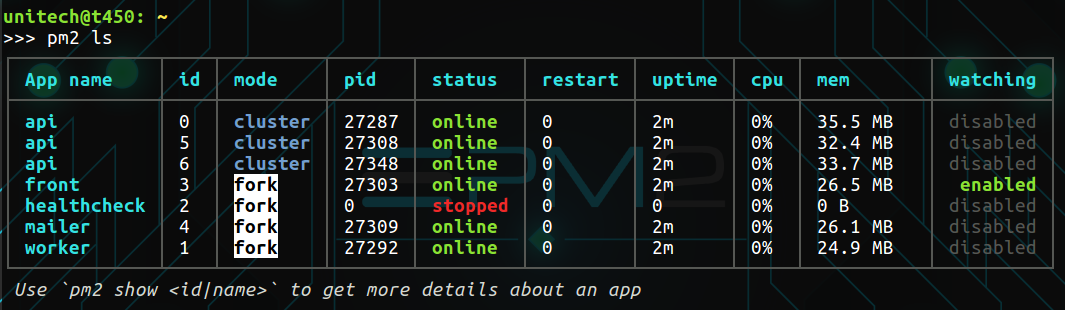
# 查看监控界面,即 pm2 list
pm2 l
更新 pm2 的方法:
# 保存当前进程状态
pm2 save
# 全局安装
npm i -g pm2
# pm2 update is necessary in order to refresh the PM2 daemon
pm2 update
关于
pm2 save的用法: pm2 save takes a snapshot of your currently running Node applications. You can then restore these applications usingpm2 resurrect. This is useful because it means you don’t have to manually restart each application when you restart pm2 (such as a machine reboot). Instead, you can just have a script that calls pm2 resurrect and it’ll start up all the Node apps.
如何启动一个项目
我们在启动一个项目的时候,首先克隆到服务器上,并且设置好 nginx 代理配置文件,主要是 server_name 和 proxy_pass,举个例子:
# nginx 配置目录 - /usr/local/nginx/conf/vhost
server {
  listen  80;
  server_name m1.xxx.com;
  location / {
    proxy_pass http://127.0.0.1:3000;
    # ...
  }
}
当我们设置完配置文件后,需要运行以下命令来重启 nginx 使其生效:
# 使用 -c 的参数指定 nginx.conf 文件的位置
nginx -c /usr/local/nginx/conf/nginx.conf -s reload
接下来我们要通过 pm2 启动项目,并且端口号设定为配置的 3000:
PORT=3003 pm2 start xxx/bin/www --name myProject
需要注意的 PORT 是我们项目里面接收的端口号环境变量的字段,比如前台 node.js 代码:
// https://github.com/indexzero/nconf
// node.js configuration with files, environment variables, and so on
var nconf = require('nconf');

// Setup nconf to use (in-order):
//   1. Command-line arguments
//   2. Environment variables
//   3. A file located at 'path/to/config.json'
//
nconf.argv()
  .env()
  .file({ file: 'path/to/config.json' });

nconf.defaults({
  'PORT': 2333, // 默认端口号
});

// Get port from environment and store in Express.
var port = nconf.get('PORT')

app.set('port', port);
这样之后,我们项目就成功启动了。大功告成 hooray!😊
自动化部署
一般情况下,我们项目部署在服务器上,但是有个问题,就是每次要更新的话必须在服务器上去操作,然后 pm2 reload 重启该进程,这样显然比较麻烦,因此我们可以借助 pm2 deploy 来进行自动化部署。具体可以参照 pm2 官方文档 Deployment 一节。
1、 Generate a sample ecosystem.json file that lists the processes and the deployment environment.
pm2 ecosystem
自动会创建 ecosystem.json 文件,当然也支持 yaml 配置文件,然后在对应位置自定义即可:
{
  // Applications part
  "apps" : [{
    "name"      : "API",
    "script"    : "app.js",
    "env": {
      "COMMON_VARIABLE": "true"
    },
    // Environment variables injected when starting with --env production
    // http://pm2.keymetrics.io/docs/usage/application-declaration/#switching-to-different-environments
    "env_production" : {
      "NODE_ENV": "production"
    }
  },{
    "name"      : "WEB",
    "script"    : "web.js"
  }],
  // Deployment part
  // Here you describe each environment
  "deploy" : {
    "production" : {
      "user" : "node",
      // Multi host is possible, just by passing IPs/hostname as an array
      "host" : ["212.83.163.1", "212.83.163.2", "212.83.163.3"],
      // Branch
      "ref"  : "origin/master",
      // Git repository to clone
      "repo" : "git@github.com:repo.git",
      // Path of the application on target servers
      "path" : "/var/www/production",
      // Can be used to give options in the format used in the configura-
      // tion file.  This is useful for specifying options for which there
      // is no separate command-line flag, see 'man ssh'
      // can be either a single string or an array of strings
      "ssh_options": "StrictHostKeyChecking=no",
      // To prepare the host by installing required software (eg: git)
      // even before the setup process starts
      // can be multiple commands separated by the character ";"
      // or path to a script on your local machine
      "pre-setup" : "apt-get install git",
      // Commands / path to a script on the host machine
      // This will be executed on the host after cloning the repository
      // eg: placing configurations in the shared dir etc
      "post-setup": "ls -la",
      // Commands to execute locally (on the same machine you deploy things)
      // Can be multiple commands separated by the character ";"
      "pre-deploy-local" : "echo 'This is a local executed command'"
      // Commands to be executed on the server after the repo has been cloned
      "post-deploy" : "npm install && pm2 startOrRestart ecosystem.json --env production"
      // Environment variables that must be injected in all applications on this env
      "env"  : {
        "NODE_ENV": "production"
      }
    },
    "staging" : {
      "user" : "node", // 登录用户名
      "host" : "212.83.163.1", // 要部署的目标服务器 ip/域名
      "ref"  : "origin/master", // 用于部署代码时的分支
      "repo" : "git@github.com:repo.git", // git 仓库地址
      "path" : "/var/www/development", // 在目标服务器上部署的文件目录地址
      "ssh_options": ["StrictHostKeyChecking=no", "PasswordAuthentication=no"],
      "post-deploy" : "pm2 startOrRestart ecosystem.json --env dev", // 部署后启动的脚本
      "env"  : {
        "NODE_ENV": "staging"
      }
    }
  }
}
2、Be sure that you have the public ssh key on your local machine
ssh-keygen -t rsa
ssh-copy-id node@myserver.com
ssh-keygen自动生成公钥和私钥,ssh-copy-id命令将公钥传送到远端服务器,可以查看之前这篇博客 👈
3、Now initialize the remote folder with:
# 首次部署,该命令会在远端服务器上创建文件目录
pm2 deploy <configuration_file> <environment> setup

# demo
pm2 deploy ecosystem.json production setup
4、Deploy your code
# 再次部署,会上传项目代码,并用 PM2 启动
# 以后都用此命令进行更新代码和部署即可
pm2 deploy ecosystem.json production
注意:本地和服务器确保都安装 PM2
当然 deploy 命令也支持其他一些参数:
# pm2 deploy help

setup                run remote setup commands
update               update deploy to the latest release
revert [n]           revert to [n]th last deployment or 1
curr[ent]            output current release commit
prev[ious]           output previous release commit
exec|run <cmd>       execute the given <cmd>
list                 list previous deploy commits
[ref]                deploy to [ref], the "ref" setting, or latest tag
# Update remote version
pm2 deploy production update

# Revert to -1 deployment
pm2 deploy production revert 1

# execute command on remote machines
pm2 deploy production exec "pm2 reload all"
与 Nginx 的配合使用
下面是一个官网的 demo,Nginx 将 80 端口代理到 3001 端口,更多可以参照 Nginx 这篇博客:
upstream my_nodejs_upstream {
  server 127.0.0.1:3001;
  keepalive 64;
}

server {
  listen 443 ssl;

  server_name www.my-website.com;
  ssl_certificate_key /etc/ssl/main.key;
  ssl_certificate     /etc/ssl/main.crt;

  location / {
    proxy_set_header X-Forwarded-For $proxy_add_x_forwarded_for;
    proxy_set_header X-Real-IP $remote_addr;
    proxy_set_header Host $http_host;

    proxy_http_version 1.1;
    proxy_set_header Upgrade $http_upgrade;
    proxy_set_header Connection "upgrade";

    proxy_pass http://my_nodejs_upstream/;
    proxy_redirect off;
    proxy_read_timeout 240s;
  }
}
nodemon / supervisor
两种常用于开发环境监听文件改动并重启服务的方式,还可以搭配 Browsersync 实现客户端自动刷新:
- nodemon - 占用内存更少,易扩展
- supervisor
nodemon index.js

# 也可省略写法,默认找 index.js
nodemon